How to use AWS Titan’s AI multimodal embeddings for better e-commerce recommendations
In November 2023, AWS released Titan, a state-of-the-art model specialized in image generation and multimodal embeddings. This guide is a practical roadmap for e-commerce platforms aiming to enhance their product recommendation systems and customer service with the latest in AI technology.
Discover how to integrate Titan into your online store, enabling chatbot interactions, personalized shopping experiences, and accurate product matches based on customer queries, like this:

This walkthrough is designed for e-commerce businesses looking to leverage AI for improved product recommendations and customer engagement. Dive into the practical applications of Titan for your online store.
Follow along for a comprehensive exploration.
Introduction
This walkthrough is on using AWS Bedrock's Titan Embed Image model to create and compare embeddings from images and text queries. This guide matches customer text queries, like "I'm looking for a red bag" with relevant product images, showcasing AI's power in e-commerce and digital customer experience.
Overview
The walkthrough is implemented in a Jupyter Notebook and uses AWS Bedrock and Titan Embed Image model to create and compare embeddings from images and text queries.
Summary
We'll walk through all the steps needed to implement AWS Bedrock and answer a customer query with relevant products from your E-commerce store.
-
Prerequisites
-
What is AWS Bedrock?
-
Request AWS Bedrock
-
Setting up Jupyter Notebook
-
Prepare product catalog
-
What are embeddings?
-
What is cosine similarity?
-
Generate product image embeddings
-
Query handling
-
Calculate cosine similarity
-
Display product recommendations
-
Summary
-
Next steps
Prerequisites
You'll need an AWS account with access to Bedrock runtime. The application process for Bedrock is detailed in the following sections.
- Python 3.x
- Jupyter Notebook
- AWS account with access to Bedrock runtime
Python libraries
- AWS SDK for Python (Boto3)
- Pandas
- Sklearn (for cosine similarity)
- Base64
- IPython
What is AWS Bedrock?
Amazon Bedrock is a fully managed service offering high-performing foundation models (FMs) for building generative AI applications.
Bedrock is serverless and offers multiple foundational models to choose between.
Pricing
Pricing for Bedrock involves charges for model inference and customization, with different plans based on usage patterns and requirements.
Multi-Modal Models
Titan Multimodal Embeddings:
- $0.0008 per 1,000 input tokens
- $0.00006 per input image
Note: This is a general overview of pricing. For the most current and detailed pricing information, please refer to the Amazon Bedrock Pricing Page
Requesting Access to AWS Bedrock Foundation Models
To use the Bedrock foundation models, follow these steps to request access:
1. Log in to AWS
Visit the AWS Management Console and sign in to your AWS account.
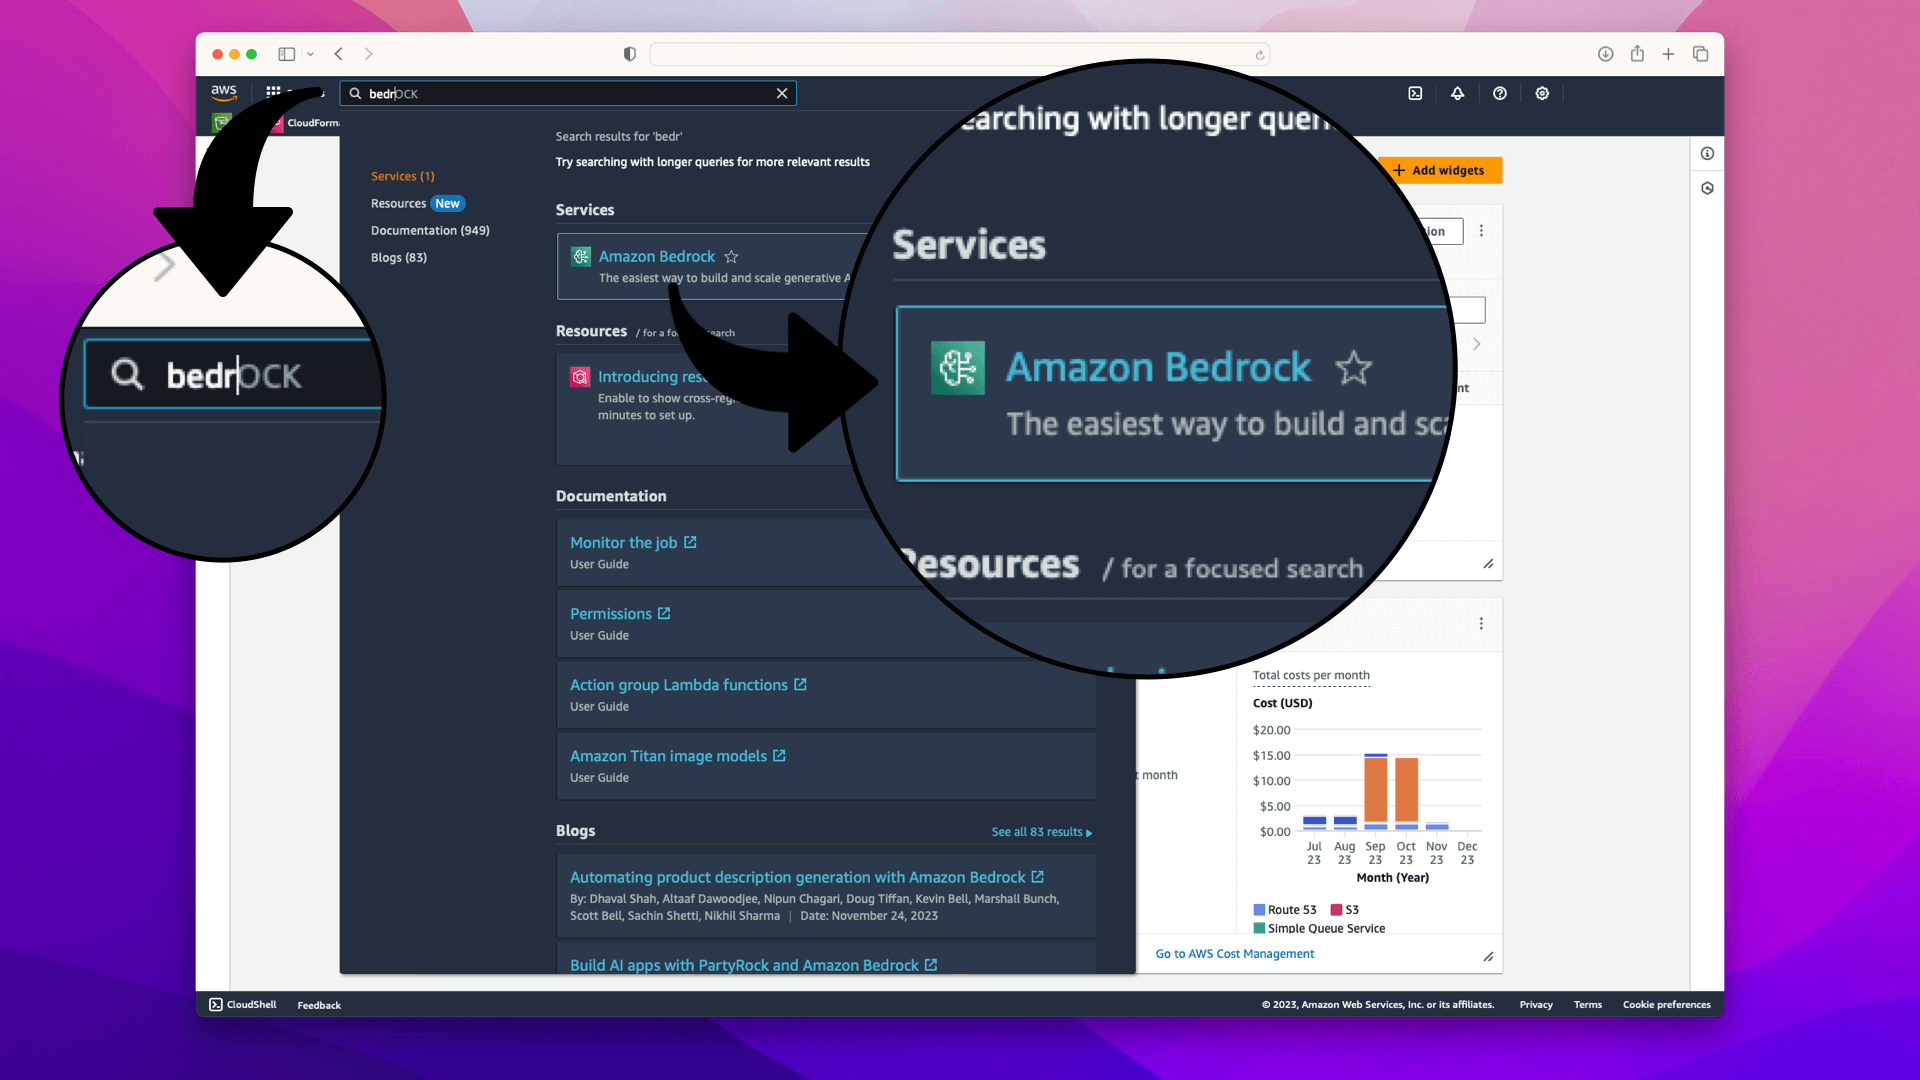
2. Navigate to Bedrock
Use the search bar at the top of the AWS Management Console to search for "Bedrock":
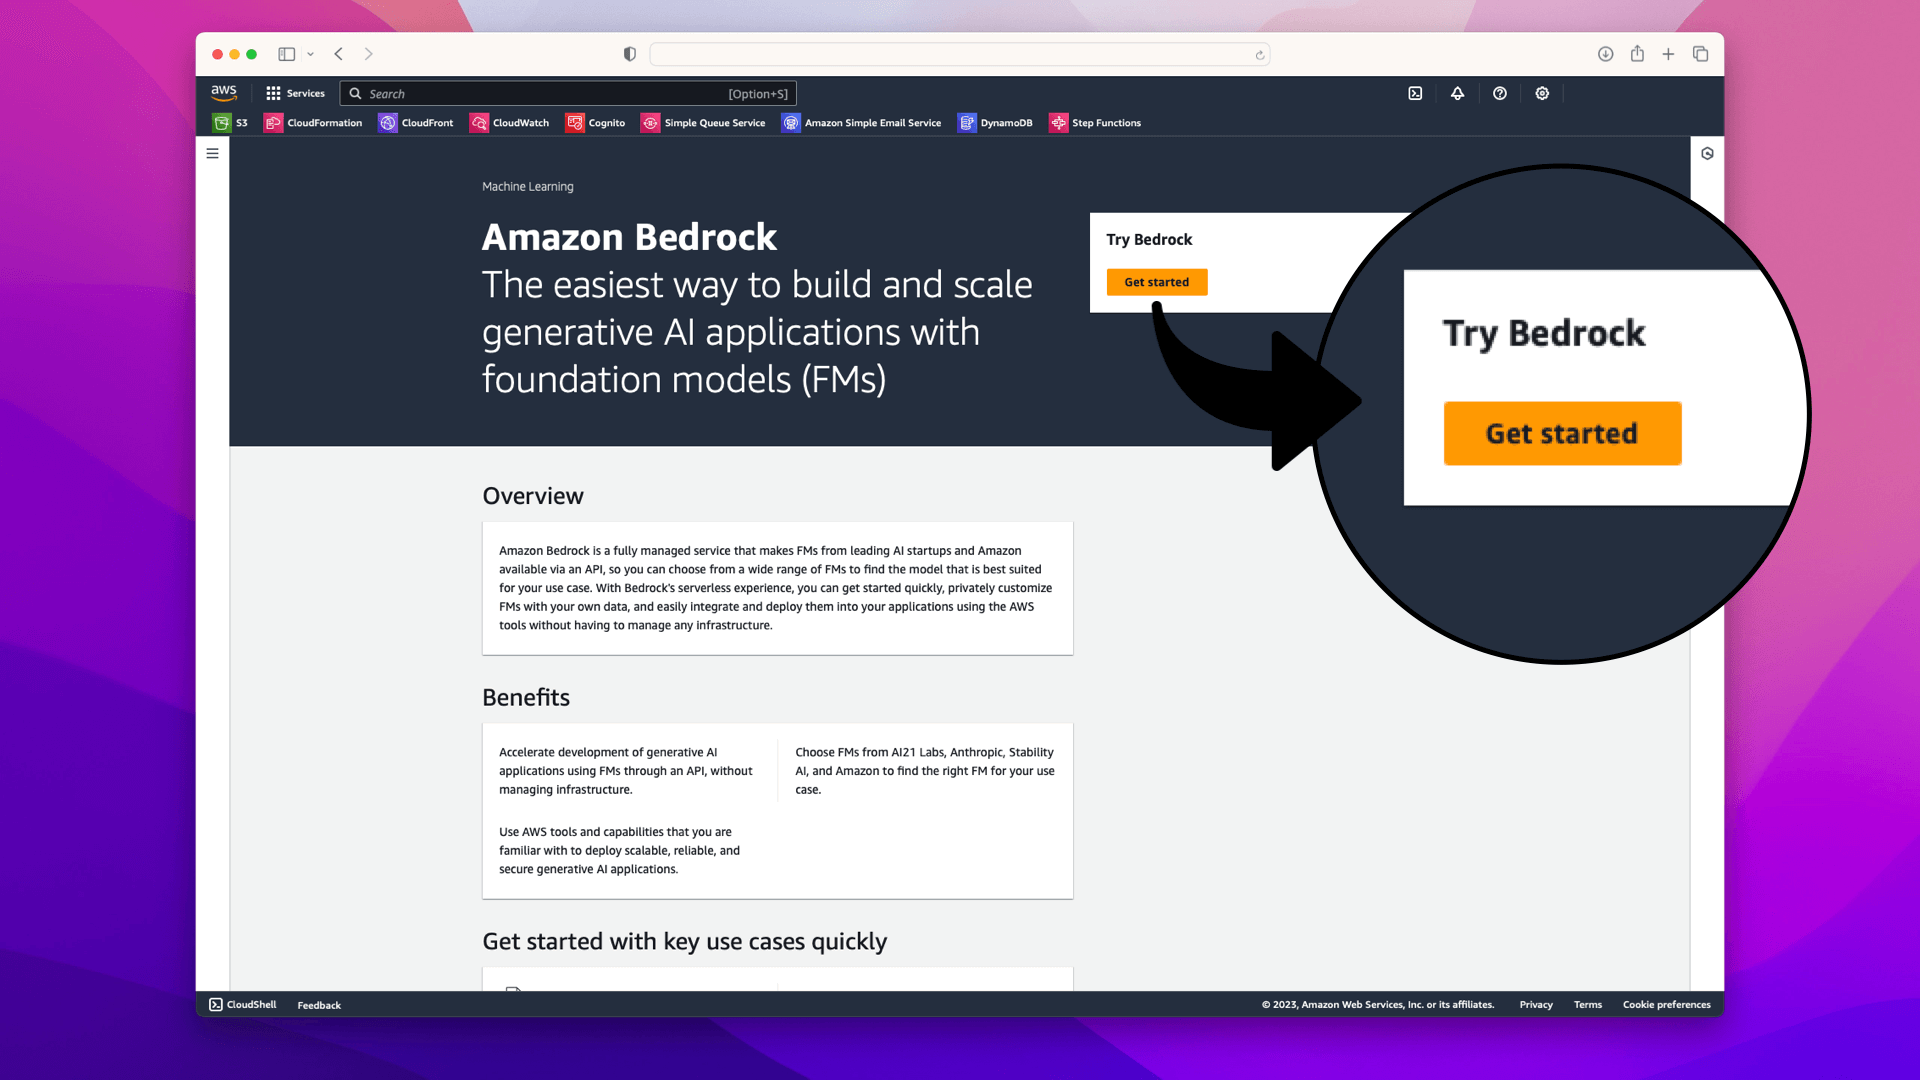
3. Initiate Access Request
On the Amazon Bedrock service page, click on Get Started:
In the popup, click Manage Model Access:

On the resulting page, click Manage Model Access:

4. Selecting the Models
In the model access section, choose Amazon from the list of available models; this will check all the available models:

Selecting Amazon from the list of available models will give you access to 5 models. We'll use 2 of these models in the walkthrough:
- [x] Titan Embeddings
- [x] Titan Multimodal Embeddings
- [ ] Titan Text - Lite
- [ ] Titan Text - Express
- [ ] Titan Image Generator
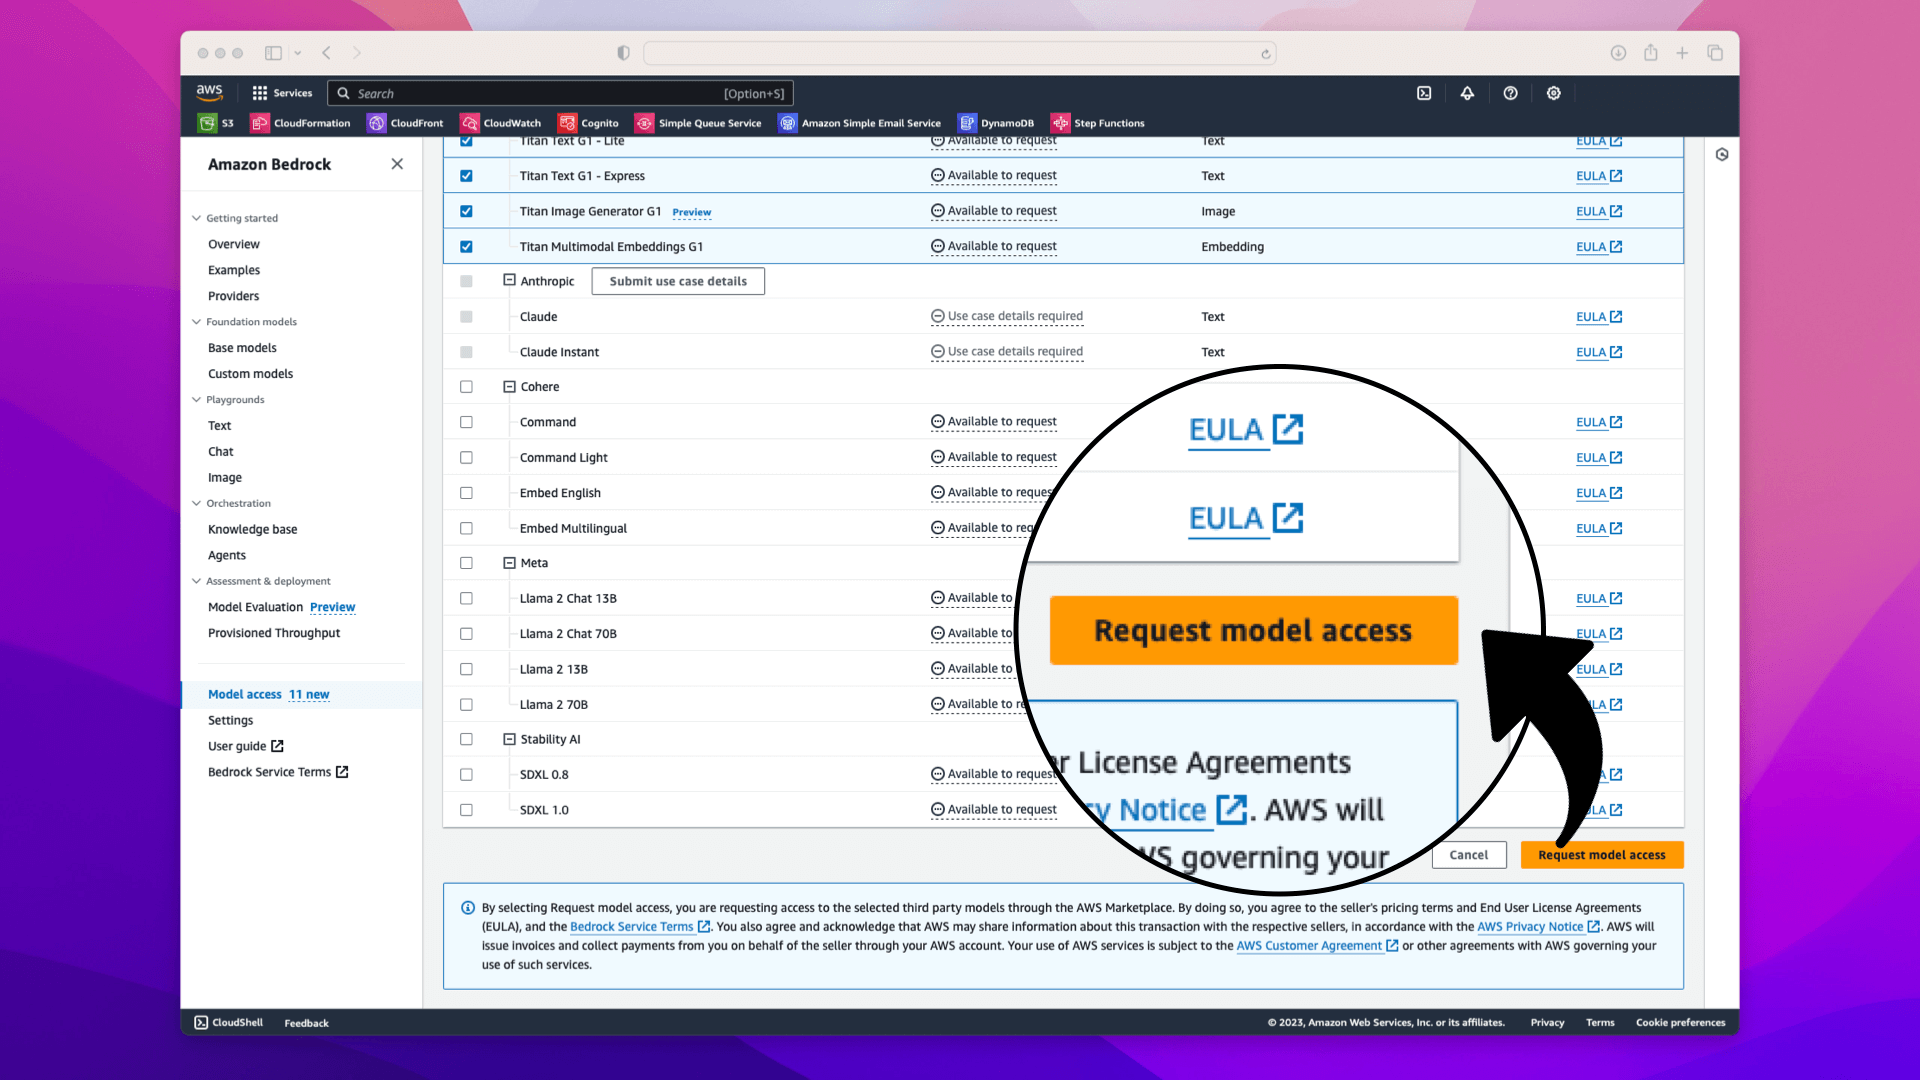
5. Finalize the Request
Scroll to the bottom of the page and click on Request Model Access:
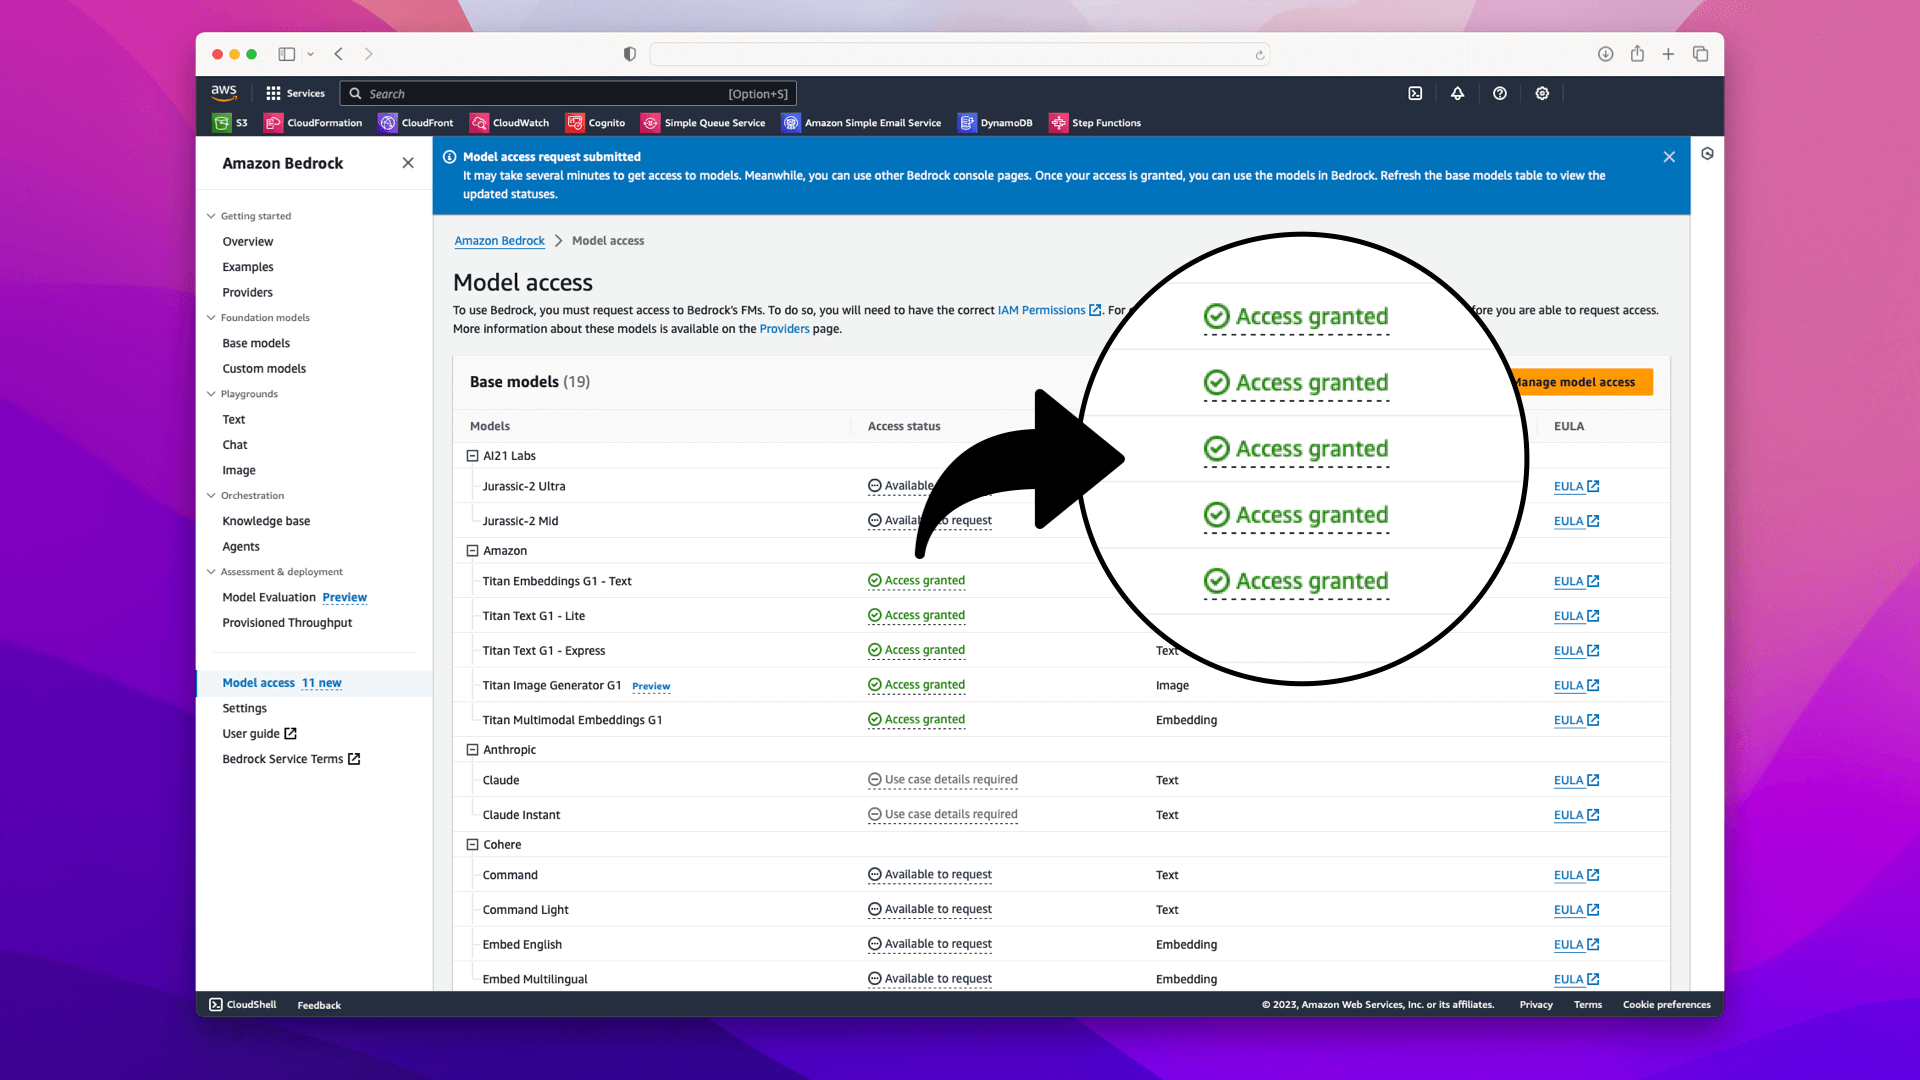
6. Confirmation
After requesting access, you will be redirected back to the Bedrock overview page, where it should now indicate that your access request is pending or granted:
Setting Up Your Jupyter Notebook for AI-Driven Image Matching
In this section, we'll walk through the setup of a Jupyter Notebook designed to leverage AWS Bedrock for AI-driven image matching.
This setup will prepare us to create and manage our product catalog effectively.
Import Python libraries
First, import the Python libraries will use:
boto3: AWS SDK for Python, needed for AWS Bedrock
botocore.exceptions: For handling exceptions related to Boto3
base64: For encoding images in Base64 format, a requirement for AWS Bedrock
json: To handle JSON data, which is often used in APIs
os: To interact with the operating system, useful for file paths
pandas: For data manipulation and analysis. We will use it to store and manipulate the image and embedding data
sklearn.metrics.pairwise: Specifically, cosine_similarity from this module helps in comparing embeddings
uuid: To generate unique identifiers for each image in our catalog
Add all the libraries at the top of the Jupyter Notebook:
import boto3
from botocore.exceptions import NoCredentialsError
import base64
from IPython.core.display import HTML
import json
import os
import pandas as pd
from sklearn.metrics.pairwise import cosine_similarity
import uuid
In the next section, we'll initialize AWS Bedrock.
Initializing AWS Bedrock
To interact with AWS Bedrock, we initialize the Bedrock runtime with your AWS profile and region. This setup is crucial for authenticating and directing our requests to the correct AWS services.
# Set the AWS profile
# Replace 'your-profile-name' with your actual profile name
aws_profile = 'your-profile-name'

# Your region
aws_region_name = "us-east-1"

try:
    boto3.setup_default_session(profile_name=aws_profile)
    bedrock_runtime = boto3.client(
        service_name="bedrock-runtime",
        region_name=aws_region_name
    )
except NoCredentialsError:
    print("Credentials not found. Please configure your AWS profile.")
If you have only one AWS profile on your computer or you are using the default profile, you can omit the boto3.setup_default_session(profile_name=aws_profile) on line 6.
AWS SDKs automatically use the default profile if no profile is explicitly set. This simplifies the script and reduces the need for manual configuration
Let's prepare a made-up product catalog in the next section.
Preparing the Product Catalog
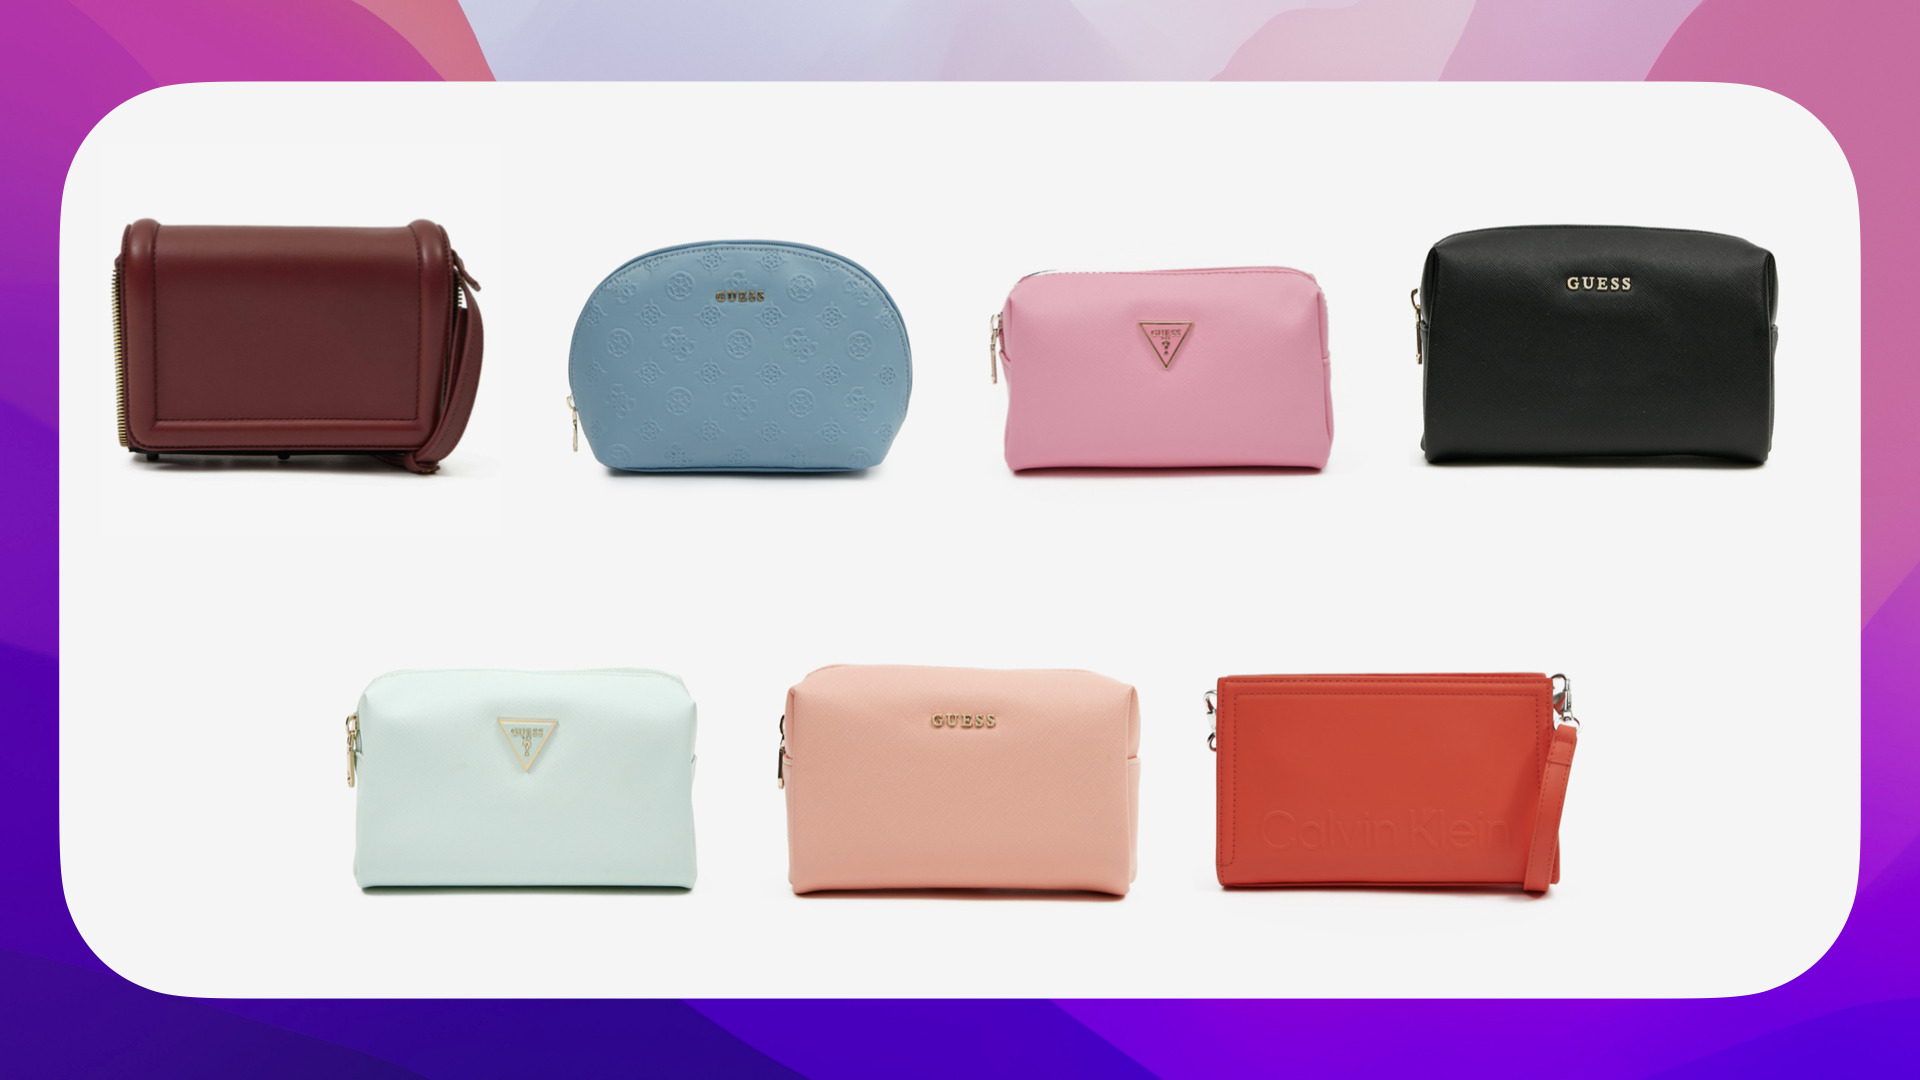
Let's create a new product catalog from scratch. Our made-up E-commerce store sells colorful bags. Start by creating a new folder for the product images and add it to the Jupyter Notebook:
image_path = "data/bags"
Next, go ahead and find images for your products. Here are the 7 bags we'll use for the walkthrough:
Now, let's go ahead and add the path and a description for each bag:
image_paths = ["1.png", "2.png", "3.png", "4.png", "5.png", "6.png", "7.png"]
descriptions = ["Red bag", "Brown bag", "Blue bag", "Pink bag", "Mint bag", "Salmon bag", "Black bag"]
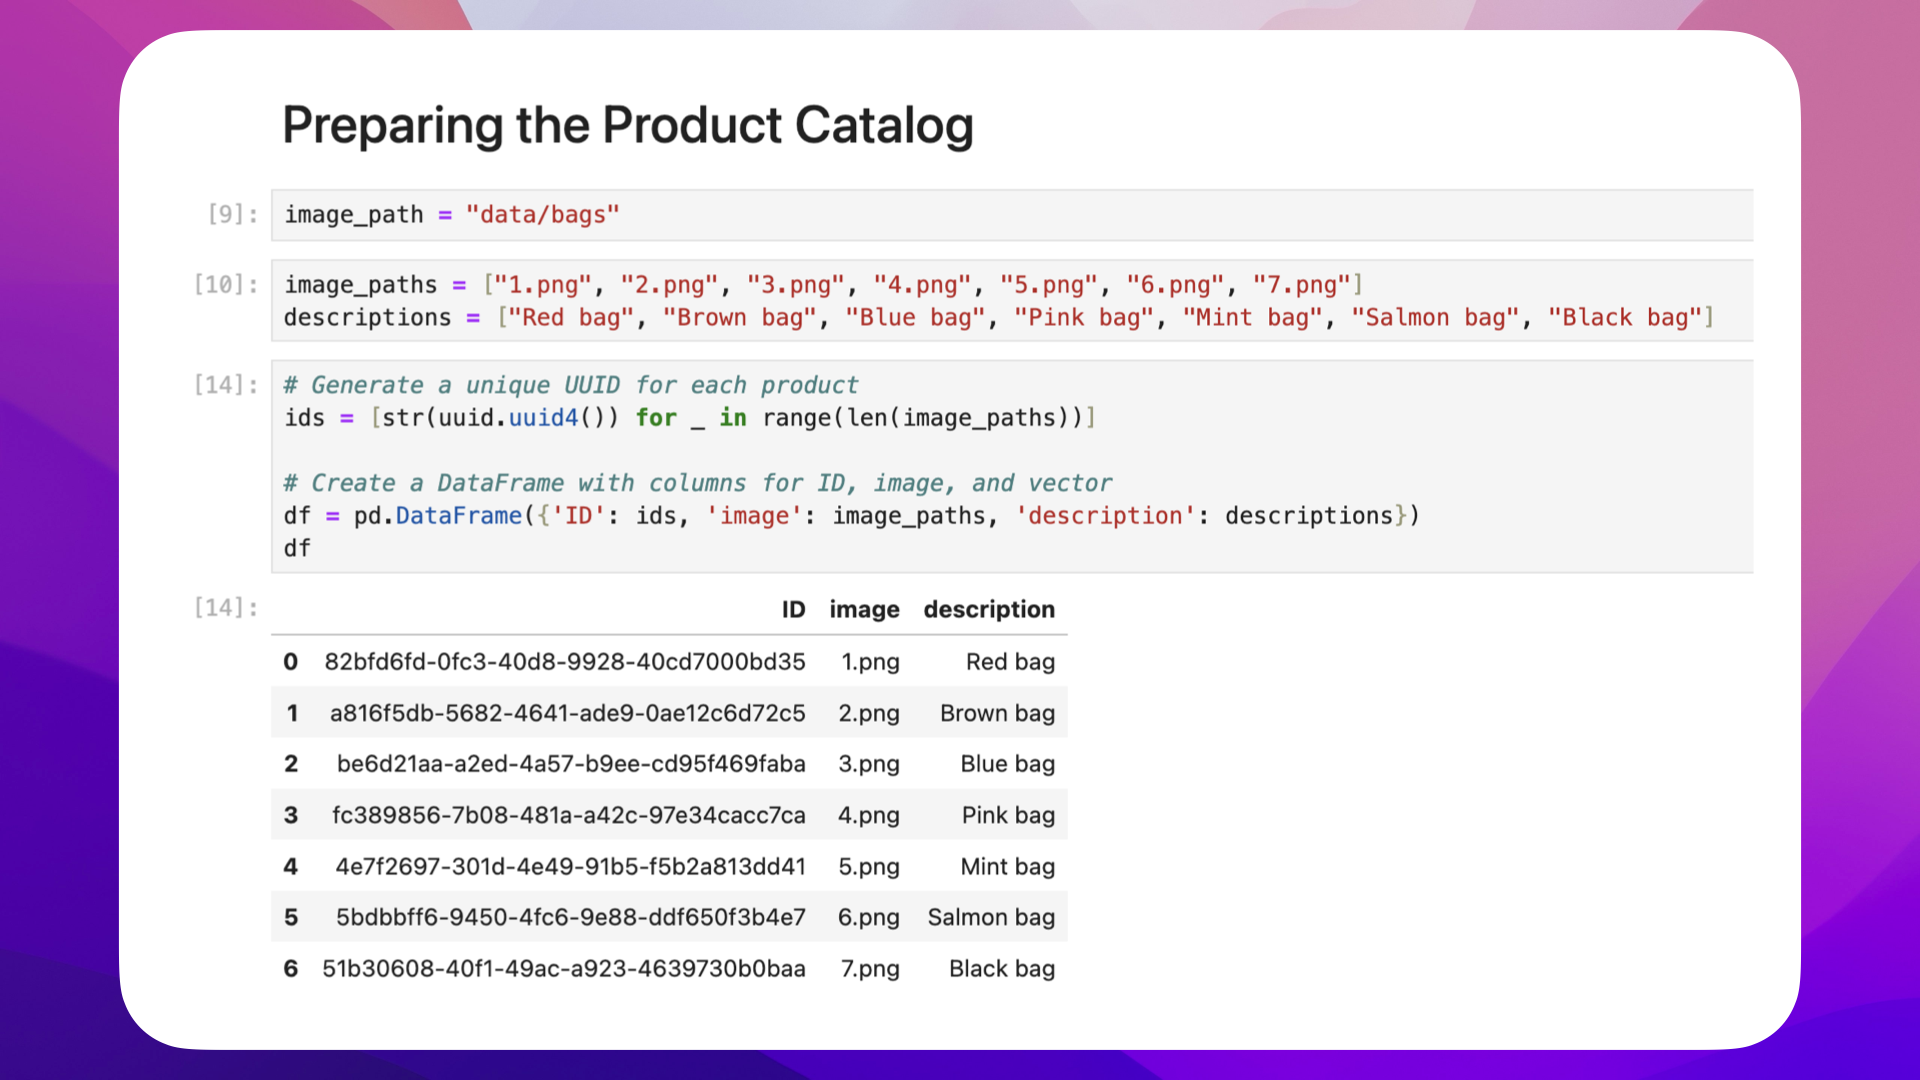
The next step is to add all the product data to a Pandas DataFrame:
# Generate a unique UUID for each product
ids = [str(uuid.uuid4()) for _ in range(len(image_paths))]

# Create a DataFrame with columns for ID, image, and vector
df = pd.DataFrame({'ID': ids, 'image': image_paths, 'description': descriptions})
df
The df output should look something like this:
Now that we have a DataFrame with our products, let's create embeddings for each bag in the next step.
What are embeddings?
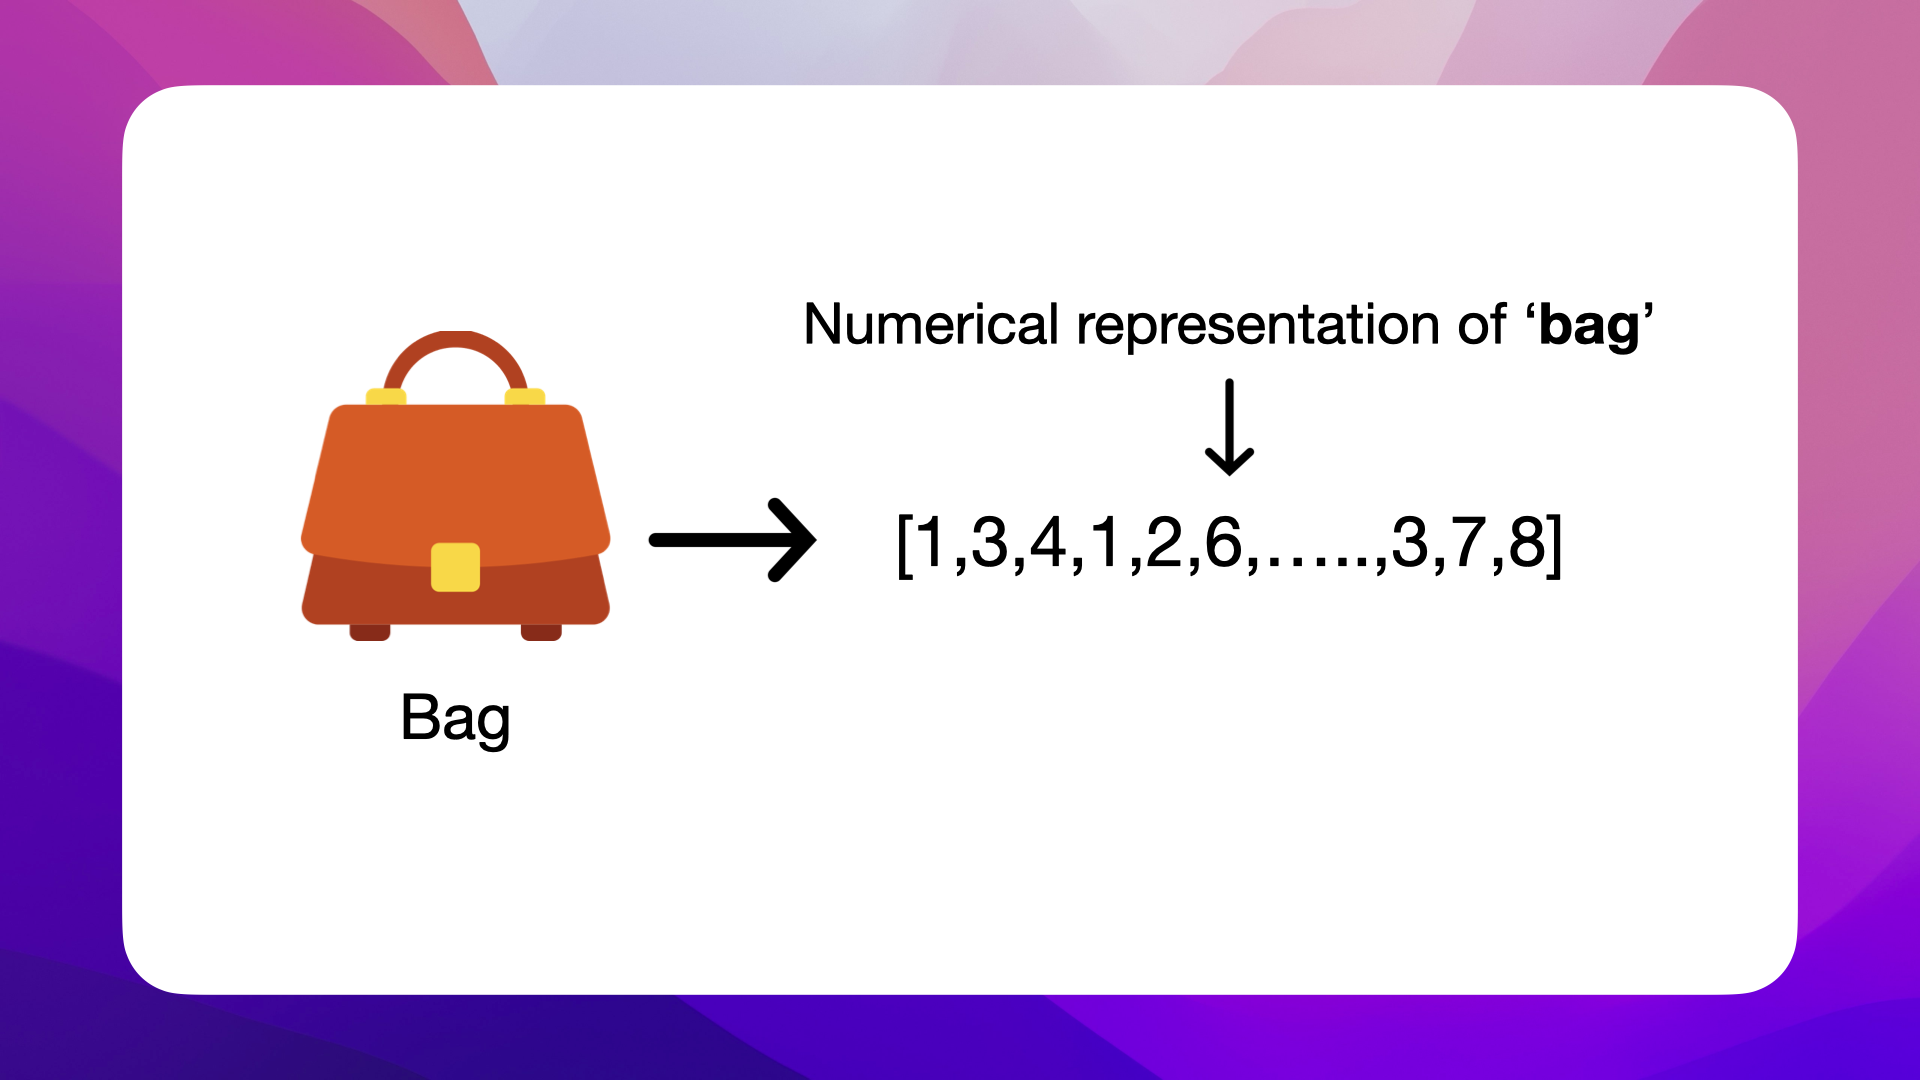
Embeddings are mathematical representations that capture the essence of data in a lower-dimensional space. In the context of AI, embeddings typically refer to dense vectors that represent entities, be it words, products, or even users.
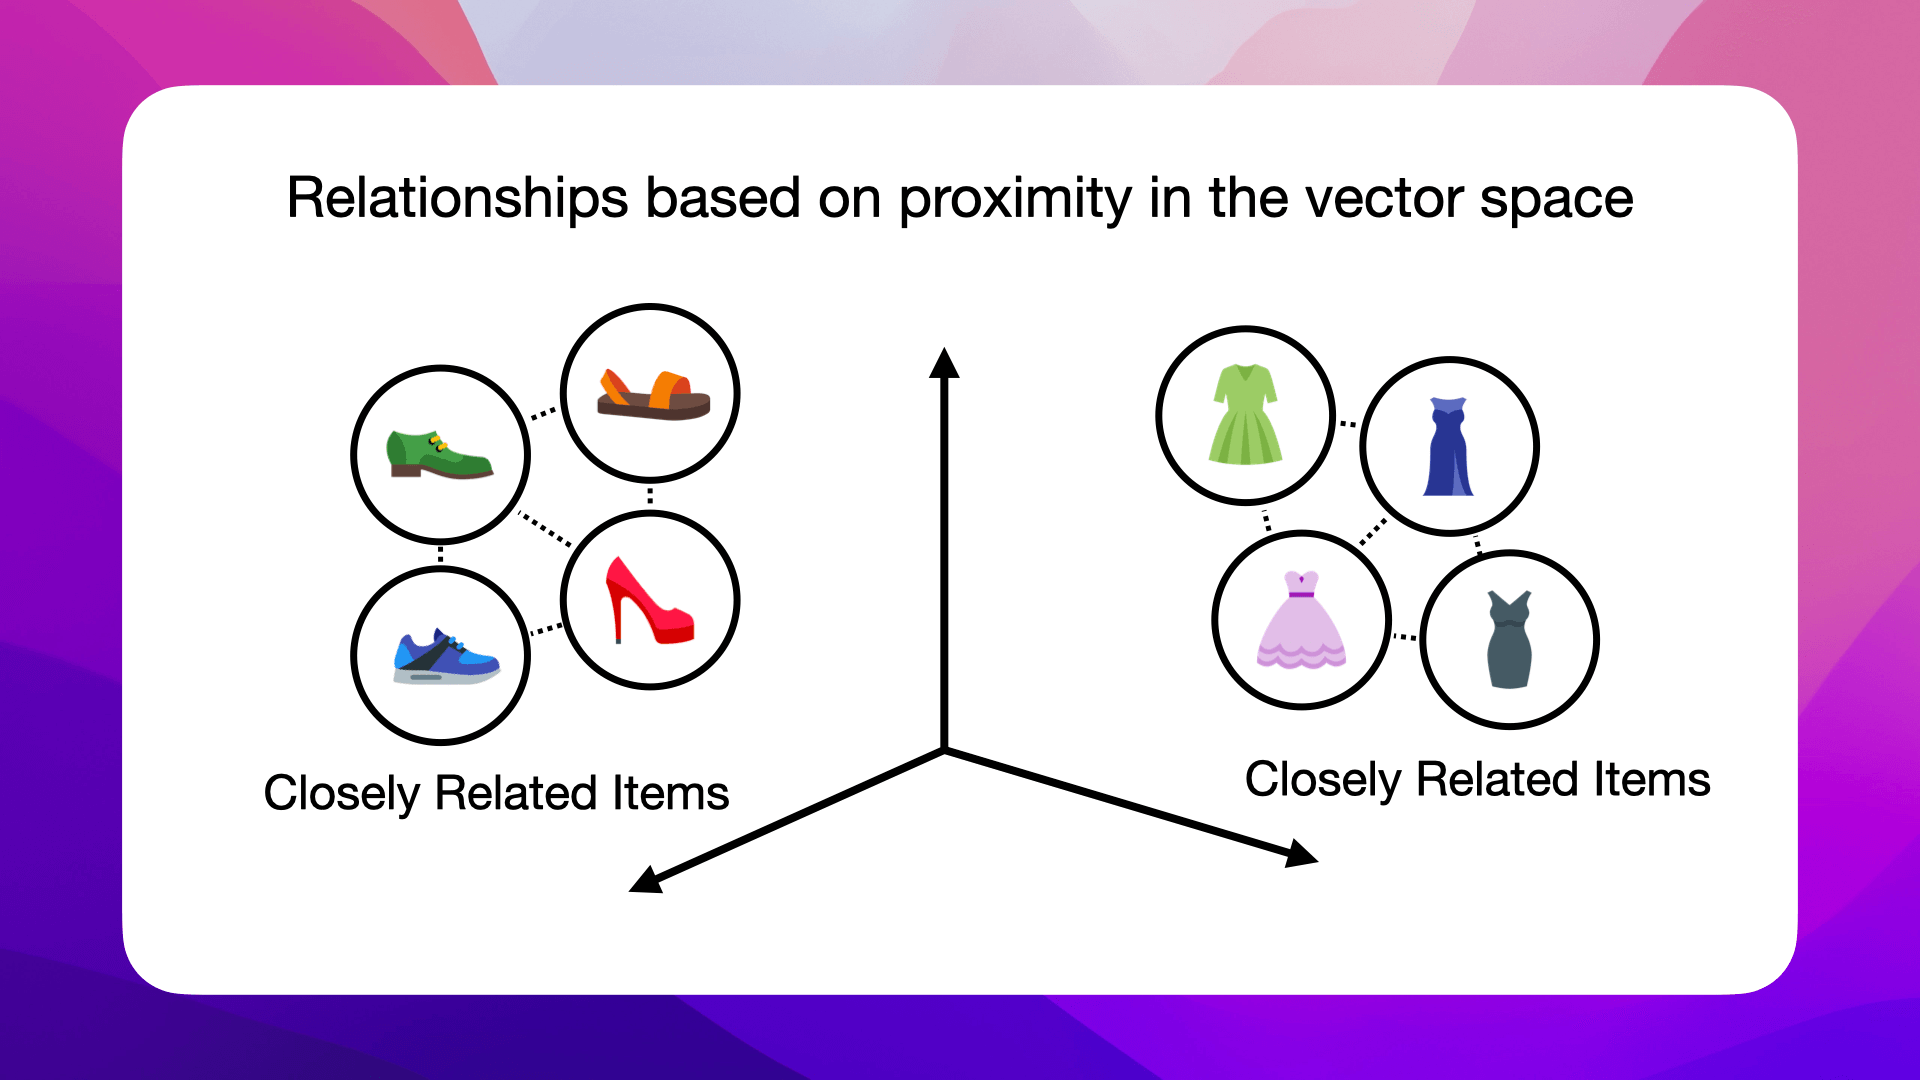
For our E-commerce use case, where our product catalog is made up of bags, here's what the numerical representation of a bag might look like:
Encoding Socks and Shoes
This illustration shows how distinct items, such as a sock and a shoe, are converted into numerical form using an embedding model. Each item is represented by a dense 300-dimensional vector, a compact array of real numbers, where each element encodes some aspect of the item's characteristics.
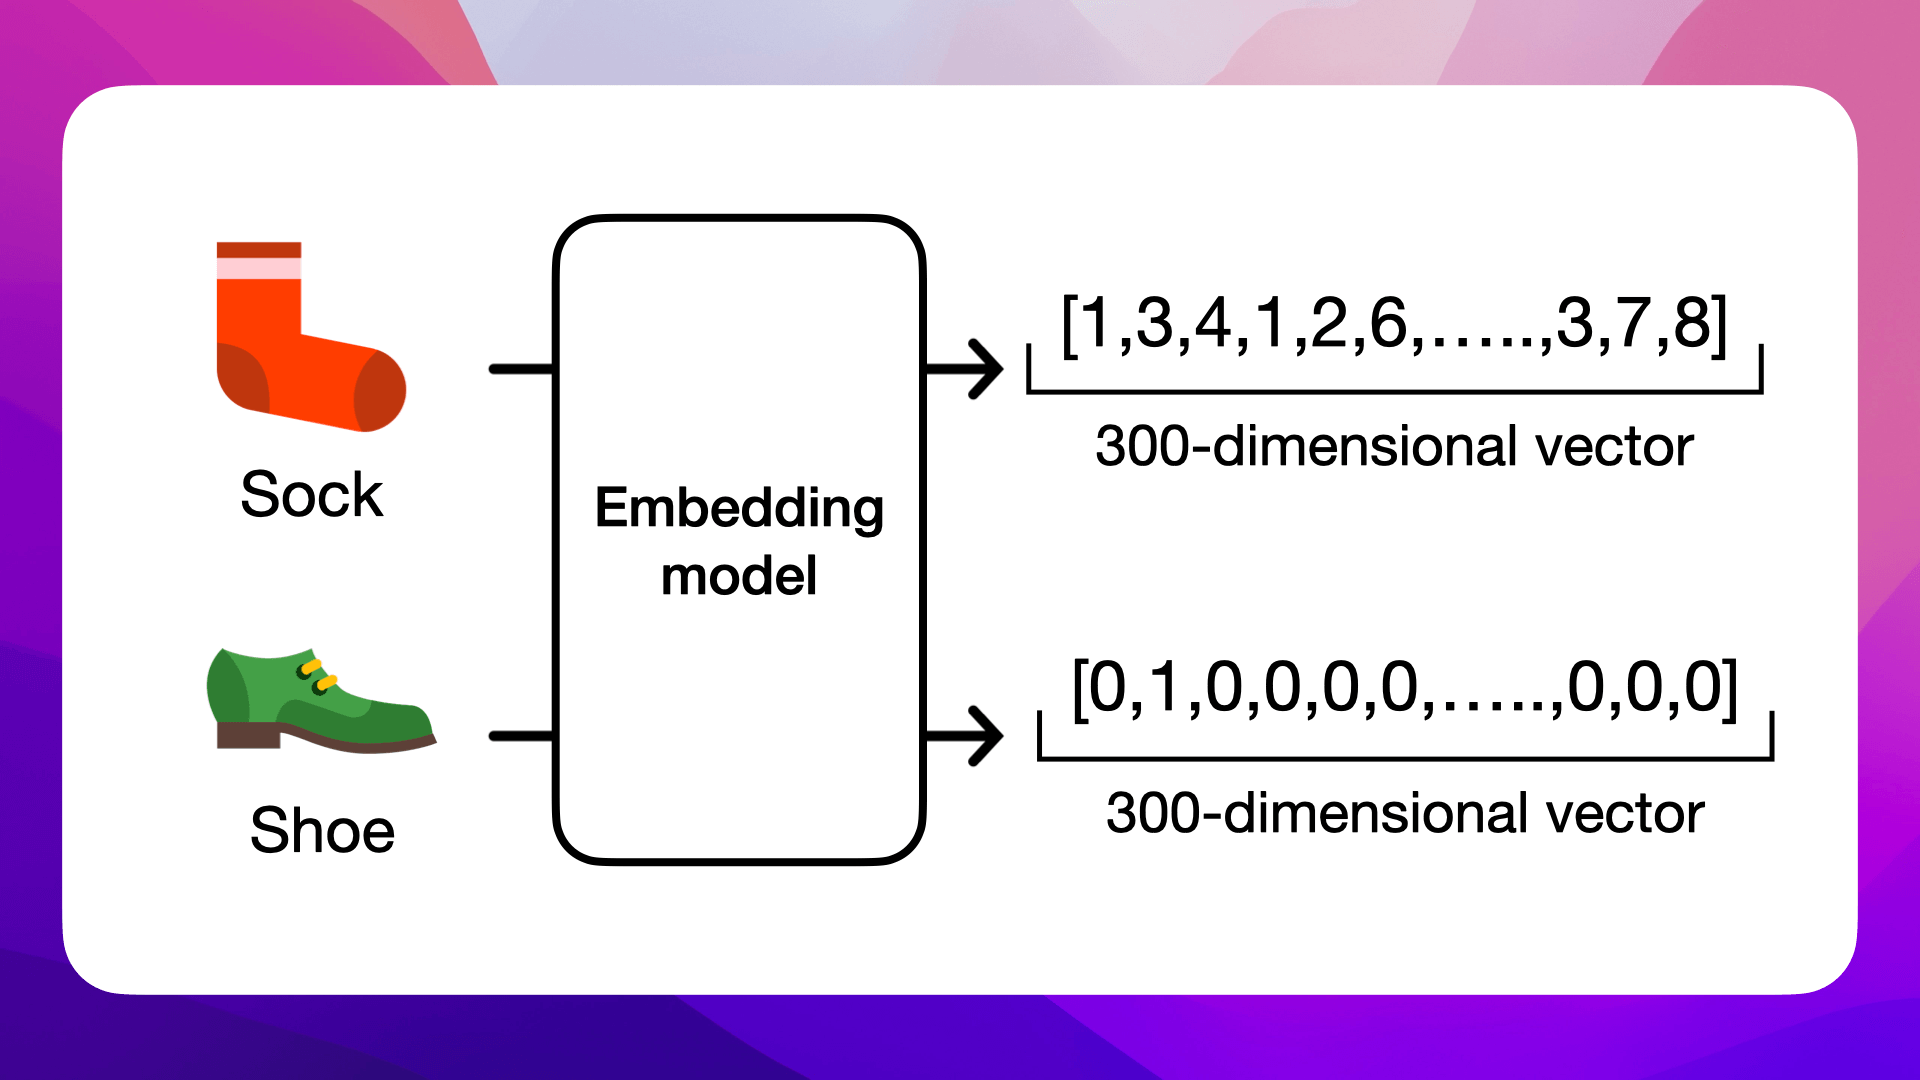
These vectors allow AI models to grasp and quantify the subtle semantic relationships between different items. For instance, the embedding for a sock is likely to be closer in vector space to a shoe than to unrelated items, reflecting their contextual relationship in the real world. This transformation is central to AI's ability to process and analyze vast amounts of complex data efficiently.
The beauty of embeddings
The beauty of embeddings lies in their ability to capture semantic relationships; for instance, embeddings of the words sock and shoe might be closer to each other than sock and apple.
Dense vs. Sparse Vectors
To understand embeddings more fully, it's important to distinguish between dense and sparse vectors, two fundamental types of vector representations in AI.
Dense Vectors
Dense vectors are compact arrays where every element is a real number, often generated by algorithms like word embeddings. These vectors have a fixed size, and each dimension within them carries some information about the data point. In embeddings, dense vectors are preferable as they can efficiently capture complex relationships and patterns in a relatively lower-dimensional space.

Sparse Vectors
Conversely, sparse vectors are typically high-dimensional and consist mainly of zeros or null values, with only a few non-zero elements. These vectors often arise in scenarios like one-hot encoding, where each dimension corresponds to a specific feature of the dataset (e.g., the presence of a word in a text). Sparse vectors can be very large and less efficient in terms of storage and computation, but they are straightforward to interpret.
The transition from sparse to dense vectors, as in the case of embeddings, is a key aspect of reducing dimensionality and extracting meaningful patterns from the data, which can lead to more effective and computationally efficient models.

Takeaway
Transitioning from sparse to dense vectors is essential in AI for reducing dimensionality and capturing meaningful data patterns.
How Embeddings Relate to Vector Space
Every embedding resides in a vector space. The dimensions of this space depend on the size of the embeddings. For example, a 300-dimensional word embedding for the word "sock" belongs to a 300-dimensional vector space:
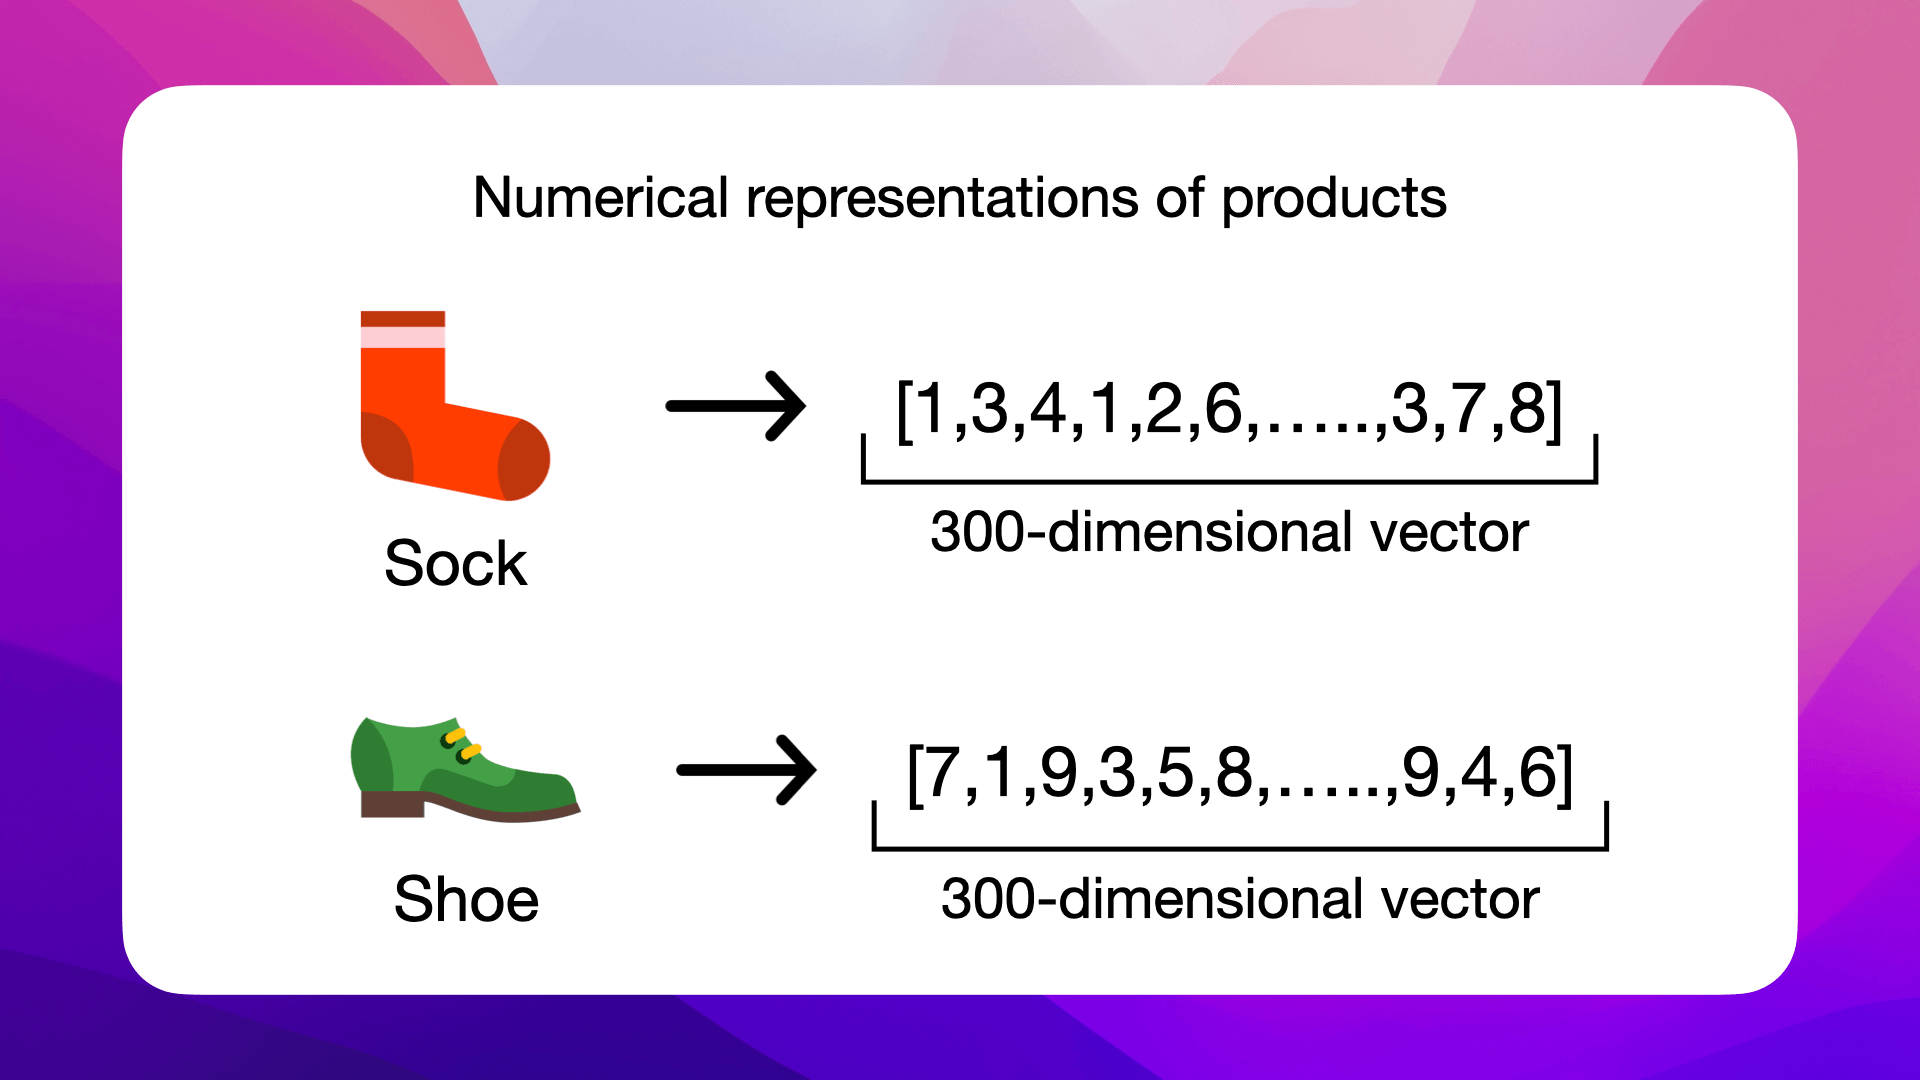
The position of an embedding within this space carries semantic meaning. Entities with similar meanings or functions tend to be closer in this space, like shoes and socks:
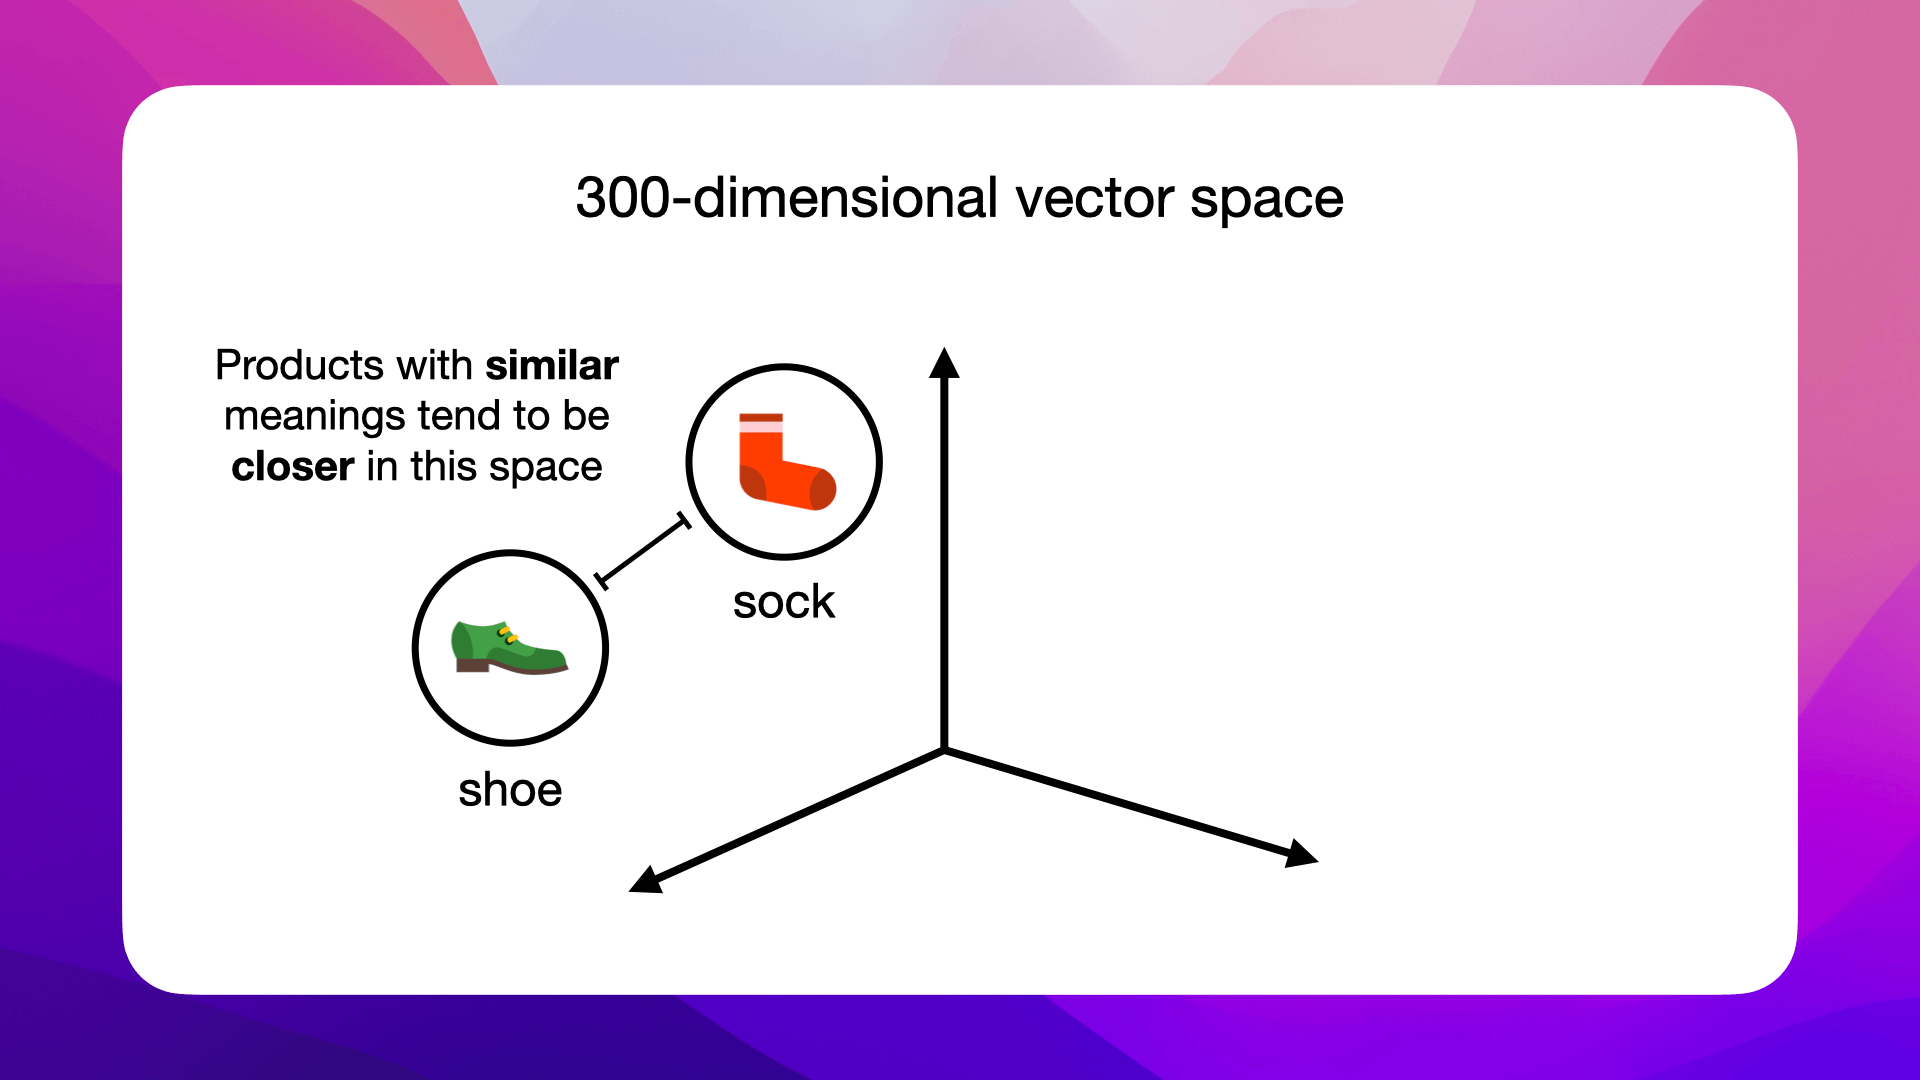
While unrelated ones, like sock and dress, are further apart:

This spatial relation makes embeddings powerful: they allow algorithms to infer relationships based on proximity in the vector space:

Now that we know what embeddings are, let's look at how we can compare and measure the similarities between one of your products and what a customer is asking about, in the next section.
Cosine Similarity in Vector Space
When we turn customer questions and product descriptions into vectors, we move into a space where we can directly compare and measure how similar items are.
But how exactly do we compare these vectors and get the right product?
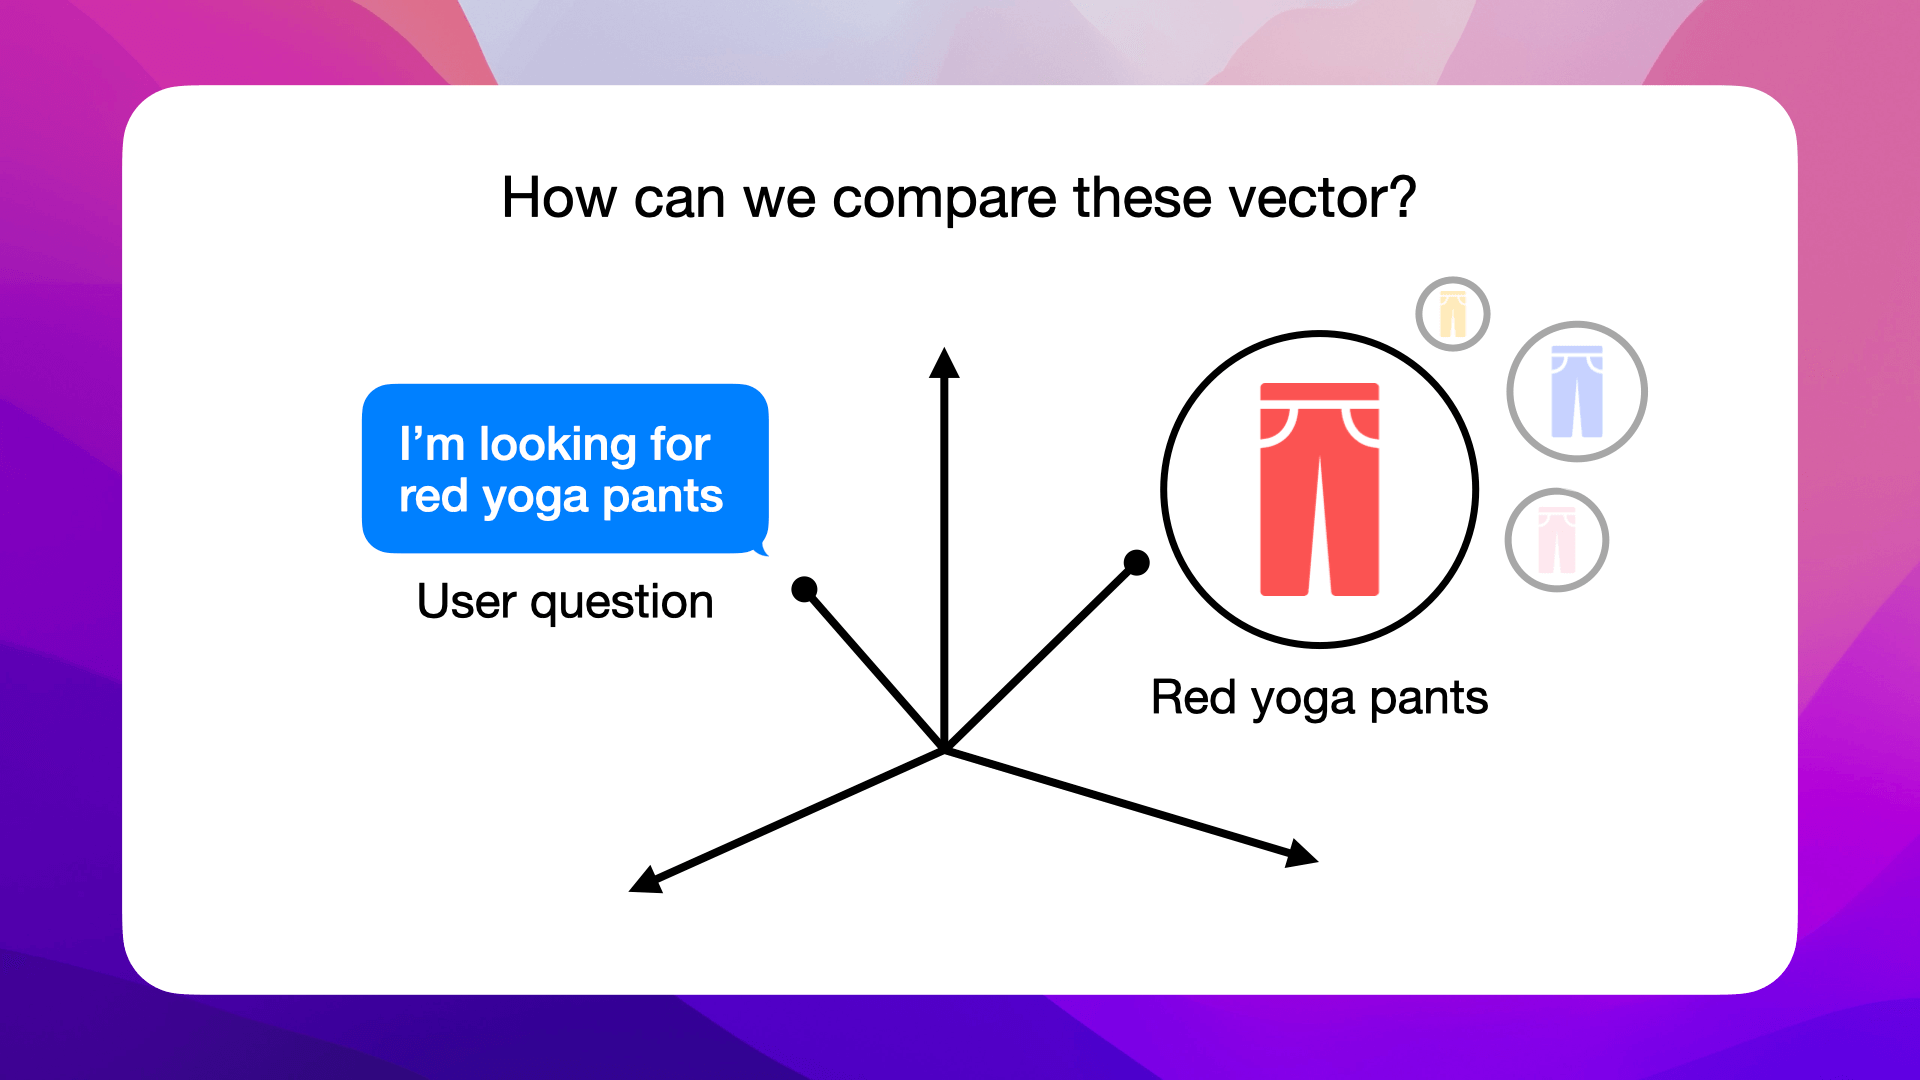
This is where we'll use cosine similarity.
Understanding Cosine Similarity
Cosine similarity measures how close two vectors are by calculating the cosine of the angle between them in a multi-dimensional space.

This technique checks the cosine of the angle connecting two points; if the vectors match, the angle is 0 degrees, making the cosine value 1, which means they're exactly alike.
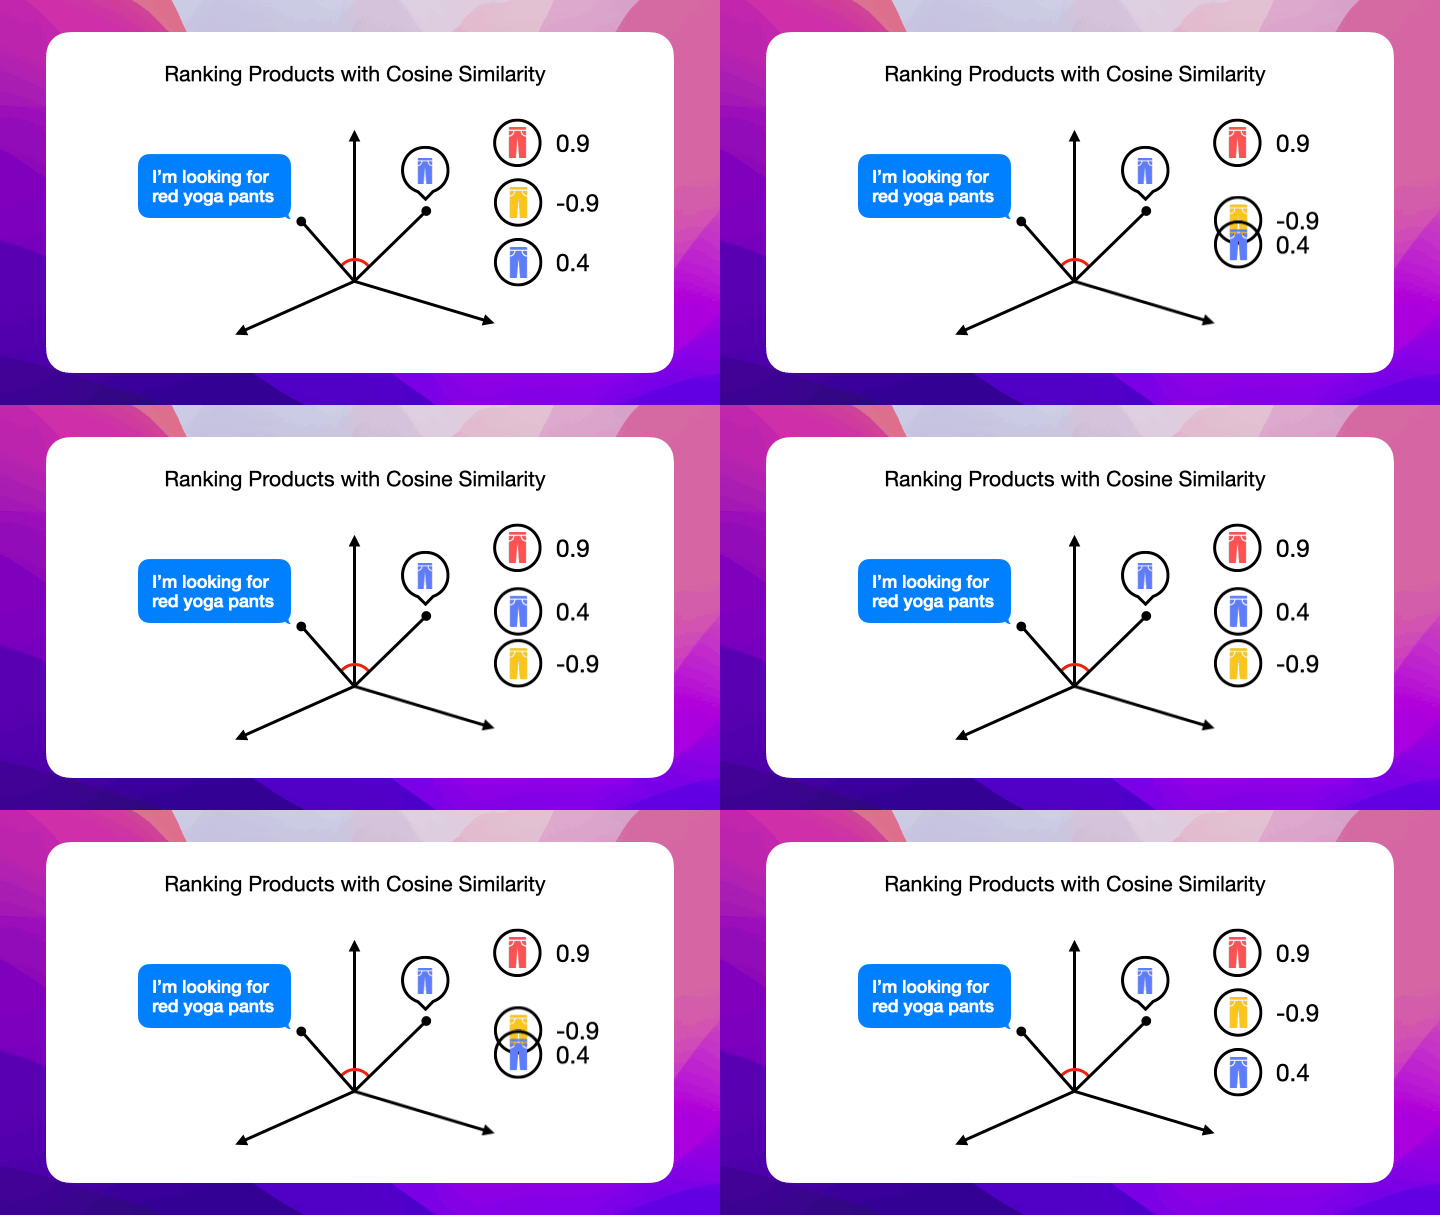
For example, if we match the vector for a customer's request for "red yoga pants" against the vector for red yoga pants, the small angle suggests they're very similar, giving a cosine score near 1.
On the other hand, if we compare it with a vector for yellow yoga pants, the bigger angle means they're not as similar, pushing the cosine score towards -1.
Simplifying Search with Cosine Similarity
Using cosine similarity, we can compare a customer's search query in vector form against all product vectors in our database to rank products. The closer a product's vector is to the query vector, indicated by a higher cosine score, the higher it ranks as a match to the customer's needs.
Example: red yoga pants
Let's say a customer searches for red yoga pants. Cosine similarity helps our search algorithm prioritize red yoga pants by recognizing their vector is closer (has a higher cosine similarity score) to the customer's query vector:

In contrast, a less similar product, like yellow yoga pants, has a wider angle to the query vector, resulting in a lower similarity score:

Cosine similarity for e-commerce
This is why embeddings and cosine similarity are game-changers for semantic search. They allow our application to grasp the context and nuances of customer questions, delivering semantically relevant products beyond just keyword matches:
Let's go back to our product catalog of bags and create embeddings for each product in the next section, so we can match them with customer inquiries.
Generate product embeddings
Now that we have our product catalog, the next step is to generate embeddings for each item.
Before we create the embeddings for each bag, let's take a closer look at AWS Titan multimodal embeddings model. Since it is a multimodal embeddings model, you can both convert text and images to embeddings.
This means that you can both use texts like "red bag" and the actual image of a red bag as input. To be able to choose between both scenarios, let's create a function where you can select which type of embedding we'd like to generate.
Embedding Generation Function
In a new cell of your Jupyter Notebook, add the following function:
def generate_embeddings(image_base64=None, text_description=None):
    input_data = {}

    if image_base64 is not None:
        input_data["inputImage"] = image_base64
    if text_description is not None:
        input_data["inputText"] = text_description

    if not input_data:
        raise ValueError("At least one of image_base64 or text_description must be provided")

    body = json.dumps(input_data)

    response = bedrock_runtime.invoke_model(
        body=body,
        modelId="amazon.titan-embed-image-v1",
        accept="application/json",
        contentType="application/json"
    )

    response_body = json.loads(response.get("body").read())

    finish_reason = response_body.get("message")

    if finish_reason is not None:
        raise EmbedError(f"Embeddings generation error: {finish_reason}")

    return response_body.get("embedding")
This function takes either an image (in base64 encoding) or a text description and generates embeddings using AWS Titan. Let's go through what the code does.
First, we're just making sure that we're receiving input data and otherwise raising an error:
if image_base64 is not None:
    input_data["inputImage"] = image_base64
if text_description is not None:
    input_data["inputText"] = text_description

if not input_data:
    raise Exception("At least one of image_base64 or text_description must be provided")
The following snippet dumps the input data and then calls Amazon Titan Multimodal Embeddings to generate a vector of embeddings:
body = json.dumps(input_data)

response = bedrock_runtime.invoke_model(
    body=body,
    modelId="amazon.titan-embed-image-v1",
    accept="application/json",
    contentType="application/json"
)

response_body = json.loads(response.get("body").read())
If in case the generation fails, we'll make sure to raise an error:
if finish_reason is not None:
    raise EmbedError(f"Embeddings generation error: {finish_reason}")
And finally, we'll return the generated embedding:
return response_body.get("embedding")
Base64 encoding function
Before generating embeddings for images, we need to encode the images in base64.
Add this function to a new cell in your Jupyter Notebook:
def base64_encode_image(image_path):
    with open(image_path, "rb") as image_file:
        return base64.b64encode(image_file.read()).decode('utf8')
Why base64 encoding?
This is necessary becauseAmazon Titan Multimodal Embeddings G1requires a base64-encoded string for theinputImagefield:inputImage – Encode the image that you want to convert to embeddings in base64 and enter the string in this field.
Learn more here: Amazon Titan Multimodal Embeddings G1
Generating Vector Embeddings
We're ready to generate vector embeddings. We'll need to call the generate_embeddings function for each product in our product catalog, so let's iterate over each product in a new cell in your Jupyter Notebook:
embeddings = []
for index, row in df.iterrows():
For each row in the DataFrame, we'll first need to base64 encode the image:
embeddings = []
for index, row in df.iterrows():
    full_image_path = os.path.join(image_path, row['image'])
    image_base64 = base64_encode_image(full_image_path)
Go ahead and call the function we just created to generate a vector embedding and append the embedding to the list:
embeddings = []
for index, row in df.iterrows():
    full_image_path = os.path.join(image_path, row['image'])
    image_base64 = base64_encode_image(full_image_path)
    embedding = generate_embeddings(image_base64=image_base64)
    embeddings.append(embedding)
Once we have the embeddings for each product in our product catalog, let's add them to the DataFrame:
df['image_embedding'] = embeddings
Your DataFrame should now look something like this:

Let's generate the embedding for the customer inquiry in the next section.
Generate customer inquiry embeddings
For customer inquiries, we'll apply the same generate_embeddings function used for products. In your Jupyter Notebook, add a new cell to generate an embedding for a customer's query, using the text_description parameter instead of image_base64:
customer_query = "Hi! I'm looking for a red bag"
query_embedding = generate_embedding(text_description=customer_query)
query_embedding
This approach converts the text of the customer's query into a vector embedding, similar to how we processed product images.
The result is a numerical vector that represents the customer's query, ready for comparison against product embeddings using cosine similarity in the upcoming steps.
The output should look something like this:

Now that we have the vectors for the images in the product catalog and the vector embedding for the customer inquiry, let's calculate the cosine similarity in the next section.
Calculate cosine similarity
Next, prepare to compare the customer query embedding with our product embeddings. Start by gathering the embeddings from your product catalog into a list:
# Extracting only the image vectors from the DataFrame for comparison
vectors = list(df['image_embedding'])
Then, calculate the cosine similarity between the customer's query embedding and each product's image vector using sklearn's cosine_similarity function:
# Calculate cosine similarity between the query embedding and the image vectors
cosine_scores = cosine_similarity([query_embedding], vectors)[0]
cosine_scores is now a list of the scores of how similar each bag is to the customer query Hi! I'm looking for a red bag:

This process produces a list of scores indicating the similarity between the customer's query and each product.
To link these scores with the corresponding products, create a Pandas series mapping scores to product images:
# Create a series with these scores and the corresponding IDs or Image names
score_series = pd.Series(cosine_scores, index=df['image'])
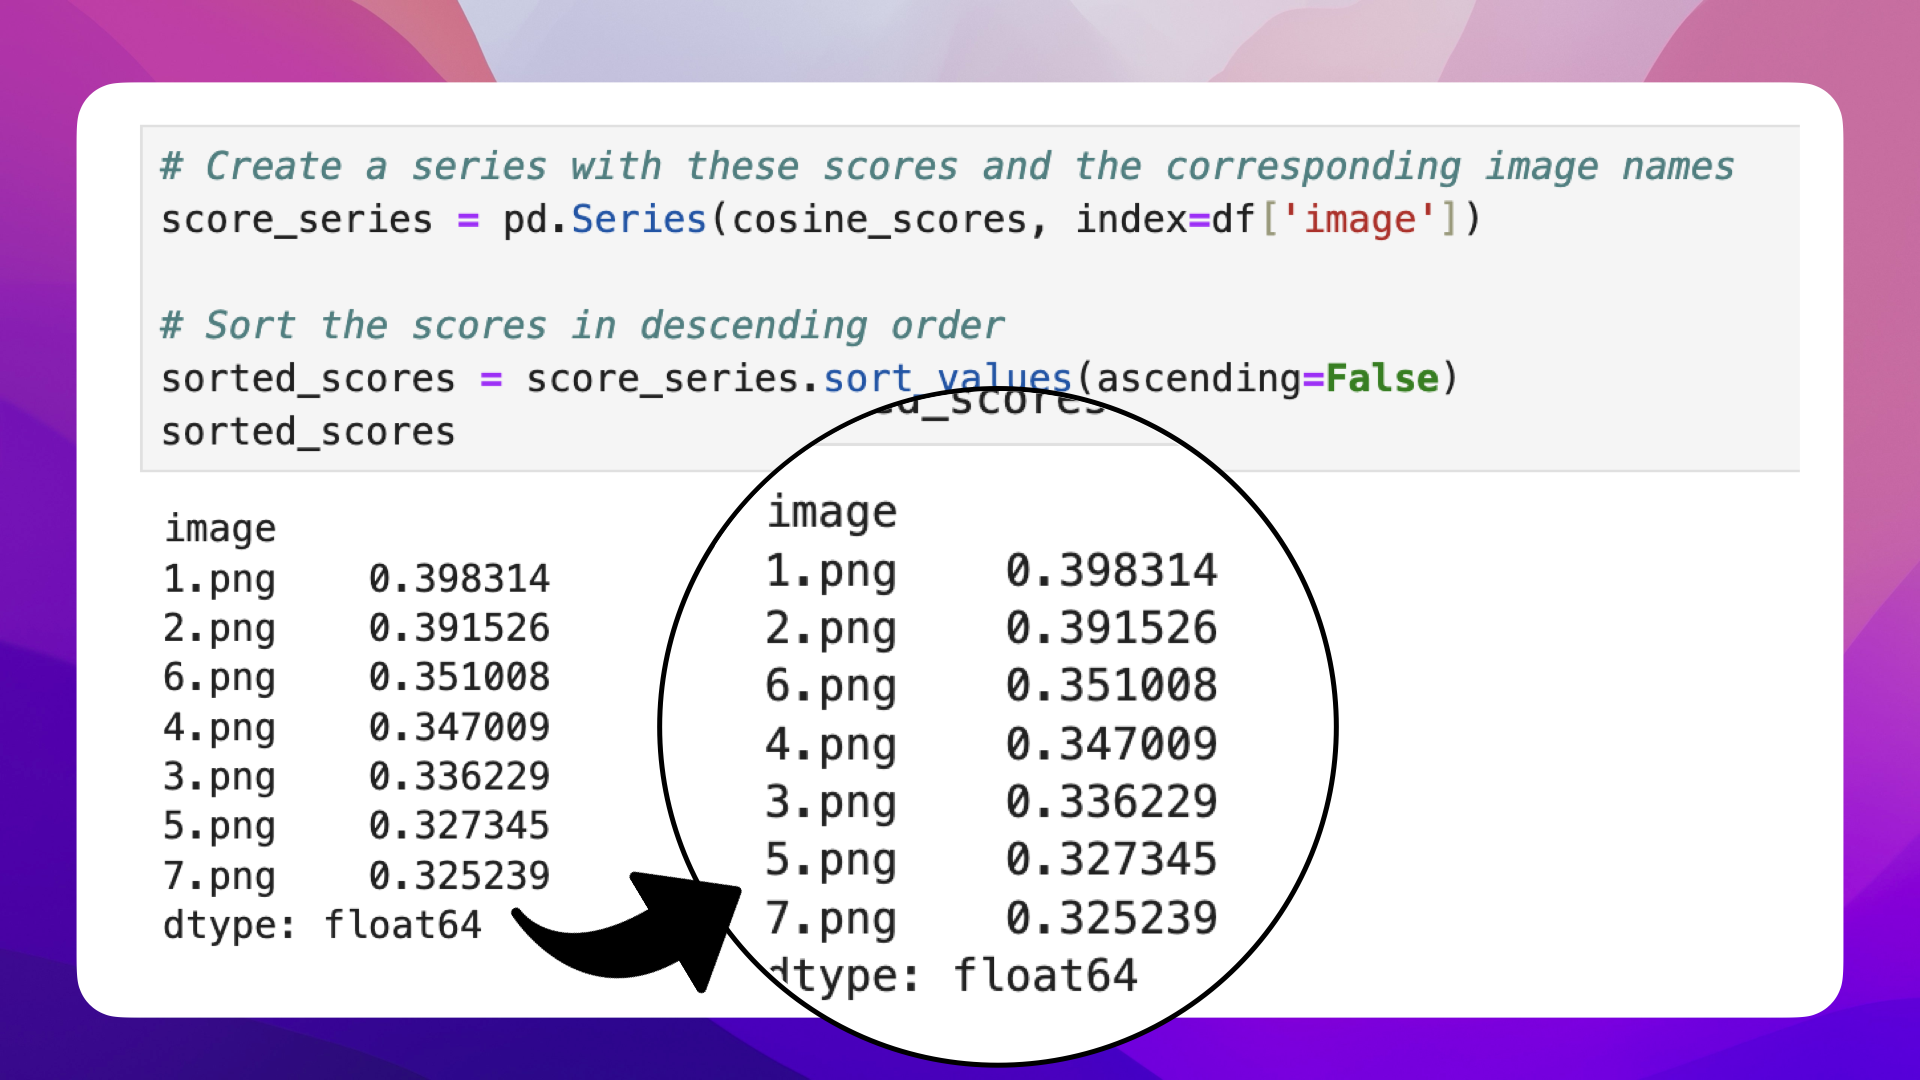
Finally, let's sort the product scores in descending order, starting with the most fitting product suggestion for the customer query Hi! I'm looking for a red bag:
# Sort the scores in descending order
sorted_scores = score_series.sort_values(ascending=False)
sorted_scores
The sorted_scores should look something like this:
Now that we have the similarity scores, let's write a code snippet to display the products in the next section.
Showcasing scores and product recommendations
To present the product recommendations and their similarity scores, we'll use IPython for rendering HTML directly in the Jupyter Notebook. Follow these steps to set up an HTML string that includes the query, images, and their scores:
# Initialize an HTML string
html_str = f"<h3>Query: '{customer_query}'</h3><table><tr>"
Iterate over the sorted scores, appending each product image and its score to the HTML string:
# Loop through sorted scores and images
for filename, score in sorted_scores.items():
    image_path = os.path.join('data', 'bags', filename)

    # Adding each image and its details to the HTML string
    html_str += f"<td style='text-align:center'><img src='{image_path}' width='100'><br>{filename}<br>Score: {score:.3f}</td>"
After looping through all relevant products, close off the HTML table and use IPython to display it:
html_str += "</tr></table>"

# Display the HTML
display(HTML(html_str))
If you run the cell, the output should look something like this:

There you have it, a recommendation system that compares the customer inquiry with your product catalog and gives the customer the most similar product.
But what happens if a customer asks for feature not shown in a product photo?
The described method with image embeddings works great when a customer asks for visible features, like color and shape. But what happens when a customer asks about a specific brand or material that might not be visible in a product photo?
For those scenarios, you'd want to combine the image vectors you already have with product description vectors and let the AI model work with both.
I'm working on a detailed course where we get to build a chatbot that can handle both cases.
Join the waitlist to learn more about integrating advanced AI capabilities into your applications: join waitlist
In the following section, we'll review the overall system we've developed.
Summary and improvements
Summary
In this guide, we walked through using AWS Bedrock and its Titan model to match customer queries with product images.
We started by setting up our tools and introducing AWS Bedrock. We then showed how to turn text and images into numerical vectors, called embeddings, which help in comparing different products.
Next, we explained how to measure the similarity between customer queries and product images using a method called cosine similarity. This helps us find the best product matches for customer searches. We covered how to create embeddings for both products and customer queries, and how to calculate and display these similarities in a clear way.
To sum up, this guide helps anyone looking to use AWS Bedrock and Titan to build a smart system, like a chatbot, that understands and matches customer searches with the right products, making online shopping easier and more efficient.
Excited to dive deeper and implement this AI-driven image-matching system in your own project?
Check the next section.
Improvements
Here are some thoughts on how you could improve this system:
1. Expanding Data Sources
Consider integrating additional data sources to enrich your product embeddings. This could include customer reviews, social media mentions, or detailed product specifications.
2. Feedback Loops
Implement a system to collect user feedback on the accuracy and relevance of the recommendations. Use this feedback to analyze and improve product recommendation over time.
3. Scalability
As your product catalog grows, ensure your system is scalable. Look into optimizing your embeddings and similarity calculations for larger datasets to maintain performance.
Next Steps
Excited to dive deeper and implement this AI-driven image matching system in your own project? If you're ready to explore the potential of AWS Bedrock and the Titan model for enhancing your e-commerce platform or any other application, here's how you can move forward:
1. Personal Guidance
If you're keen on implementing this but need some guidance, don't hesitate to reach out.
I'm here to help you navigate through the setup and customization process for your specific needs. Contact me at [email protected]
Alternatively, feel free to shoot me a DM on Twitter @norahsakal
2. Comprehensive Course
For those interested in a more detailed walkthrough, I'm currently developing a course that covers everything from the basics to more advanced topics like searching for non-visible features (brands or materials) using text vectors.
This course will provide you with the knowledge and tools to leverage both image and text data for more nuanced and effective product matching. And we'll build a chatbot using GPT-3 and GPT-4 to answer customer questions.
Join the waitlist
Secure Your Spot: join the waitlist
3. Source Code
I've shared the complete source code for this project in GitHub, get it here: https://github.com/norahsakal/aws-titan-multimodal-embeddings-product-recommendation-system
4. Tailored AI solutions
I provide one-on-one collaboration and custom AI services for businesses.
Let's find the perfect solution for your challenges: Consulting Services
Originally published at https://norahsakal.com
